Zapier
Overview
Connecting Supabase to Zapier
Zapier is a powerhouse in automation that effortlessly connects different platforms — Supabase included. This post will show you how to connect your Supabase PostgreSQL instance with Zapier.
It will emphasize security practices and highlight Supabase features that will help you manage your integration. Additionally, it addresses Zapier's limitations and suggests alternatives to overcome them.
Walkthrough
This guide will show you how to send emails when database events occur, but it can be generalized to work with any Zapier connection.
Database Set up
Create a user_profile table:
In your project’s SQL Editor, execute the below query. This will be used as the example table for the walkthrough.
_10create table "products" (_10 "product_id" serial primary key,_10 "product_name" varchar(512) not null,_10 "price" decimal(10, 2) not null,_10 "description" text,_10 "stock_quantity" INT DEFAULT 0_10);
Insert some items into your product table:
_10insert into "products" (_10 product_name,_10 price,_10 description,_10 stock_quantity_10)_10values_10('Pokeball', 4.99, 'Basic Poké Ball for catching Pokémon.', 100),_10('Great Ball', 7.99, 'Better than a Poké Ball, higher catch rate.', 75),_10('Ultra Ball', 12.99, 'High-performance ball with excellent catch rate.', 10);
You should be able to see your newly created table in your Dashboard’s Table Editor
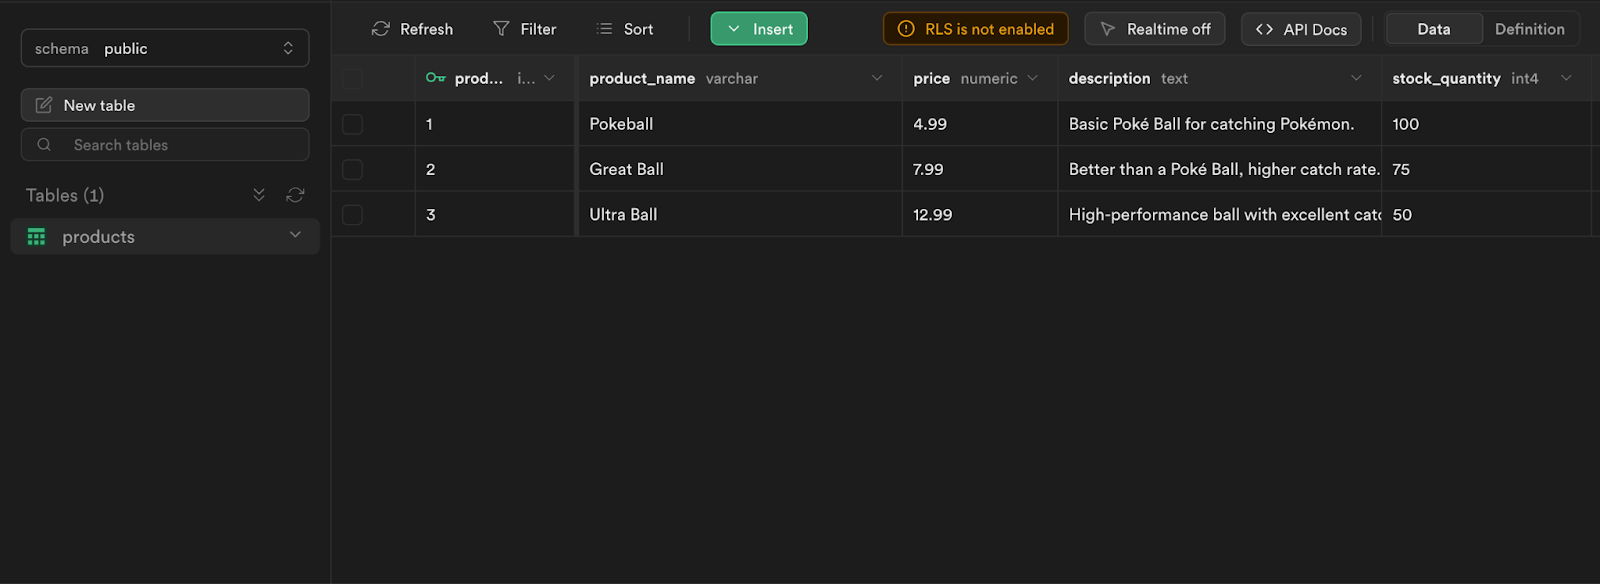
Zapier Triggers and Actions:
Depending on your settings, Zapier will connect to your database every 2 to 15 minutes to observe changes. When information is added or updated in PostgreSQL, Zapier can initiate external events, like sending an email.
Here are the types of PostgreSQL events that Zapier can respond to:
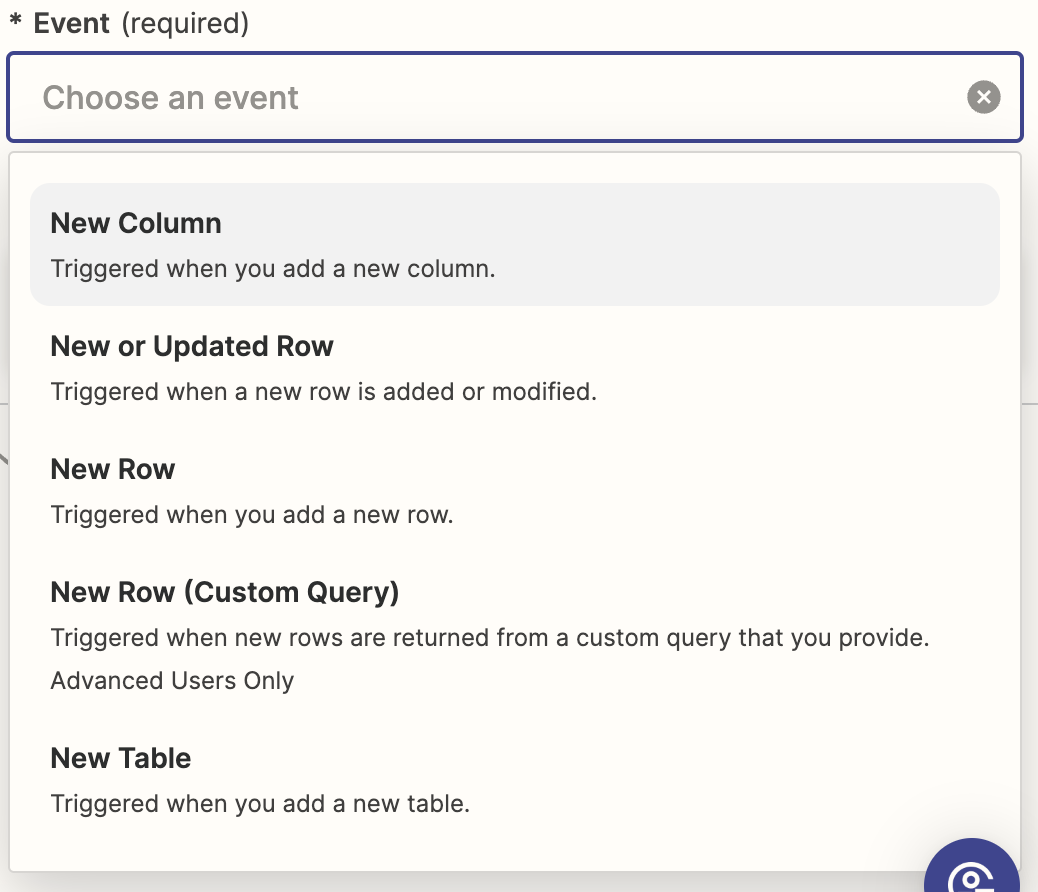
Unfortunately, at the time of writing, Zapier is unable to respond to destructive events, such as deleting a row or dropping a table. Likewise, when an external event occurs, such as a change in a Google Spreadsheet, Zapier can only update, insert, or read rows within PostgreSQL.
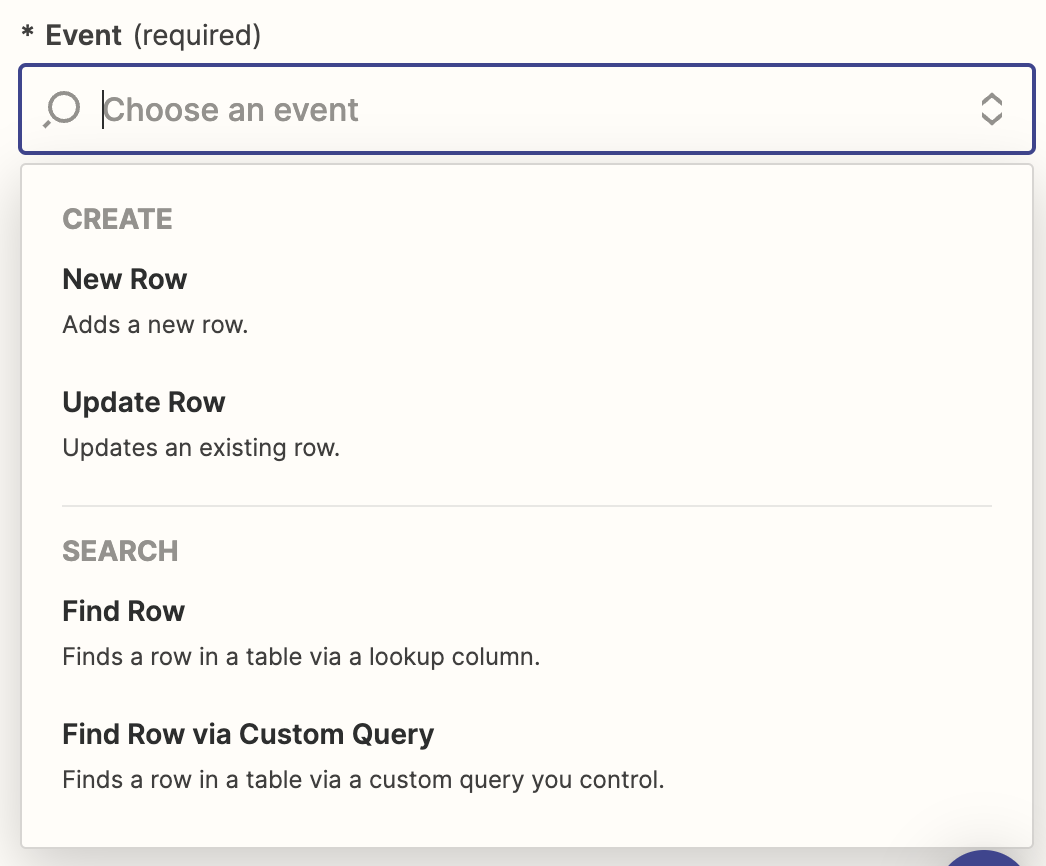
Zapier can essentially respond to any update or creation event, but it is incapable of observing delete or drop events in PostgreSQL. Don’t worry! This tutorial will offer alternatives to circumvent these limitations.
Creating a Custom Zapier User:
Best practice demands that you create a new PostgreSQL user for Zapier. In the worst-case scenario where your Zapier account gets compromised, you want to have user restrictions against the custom user to protect your data.
Create a “zapier” User in the SQL Editor:
create user "zapier" with a “super secret password”;
_10CREATE USER "zapier" WITH PASSWORD '<new password>';
In the Dashboard’s Database section under roles, you should be able to see your new user.
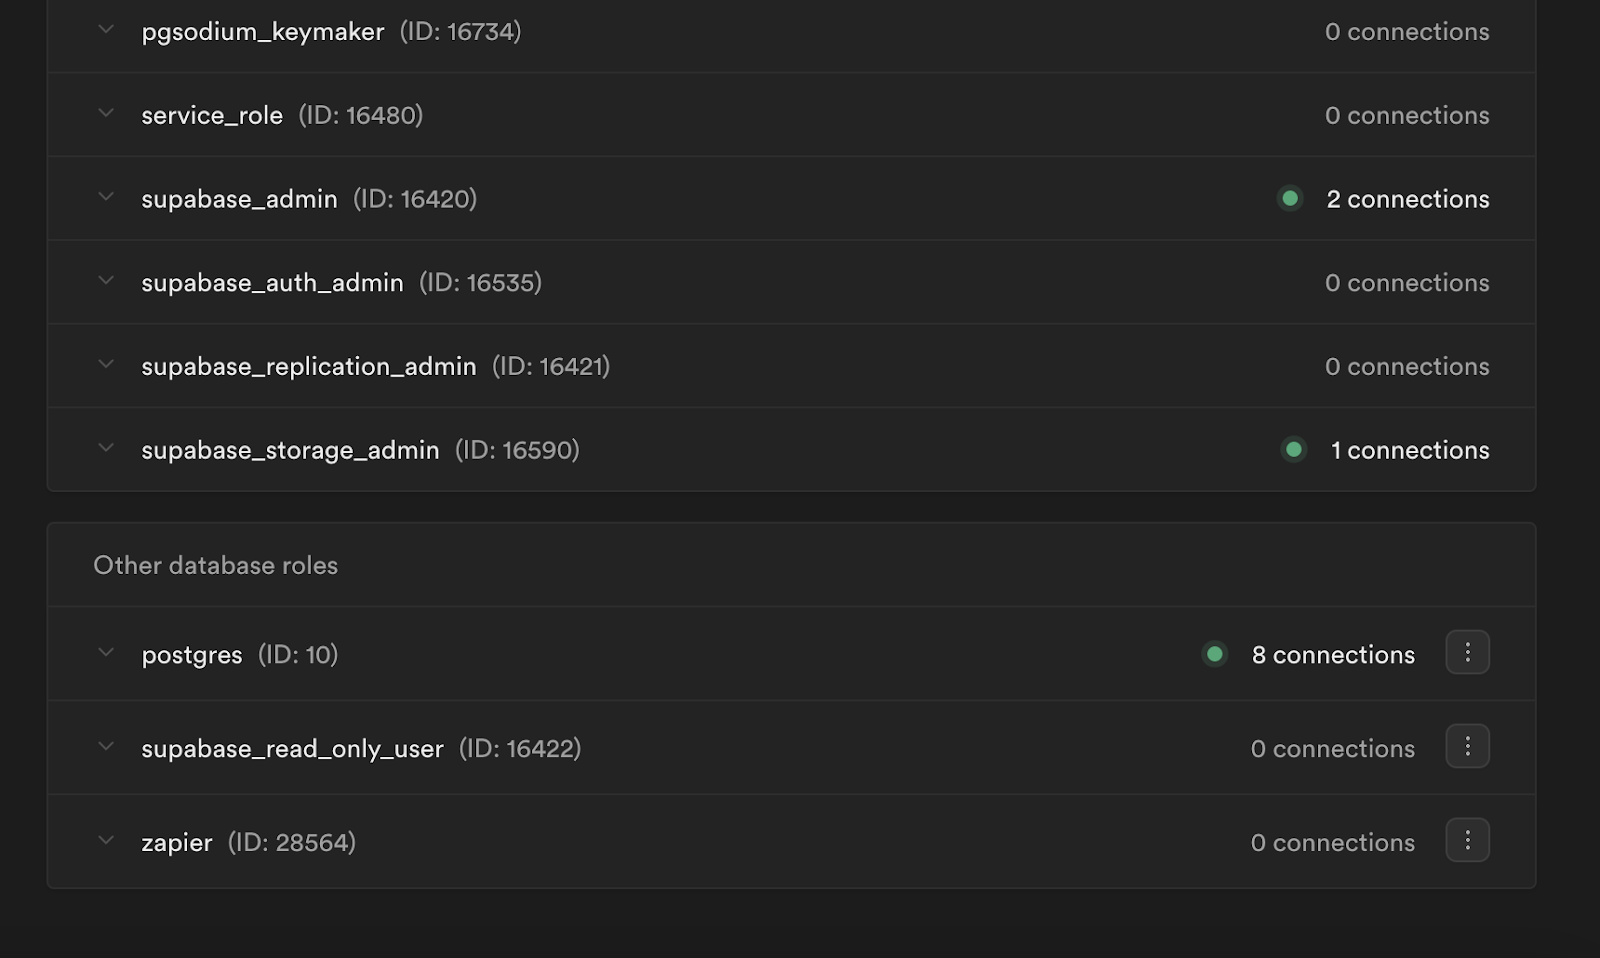
All new database users are capable of seeing what database objects exist, such as tables and schemas, but they are unable to look at their data or definitions, nor are they able to call commands, such as SELECT or DELETE. You will need to explicitly grant the necessary privileges to your new “zapier” user. Here is a visual of all possible user privileges from the PostgreSQL documentation.
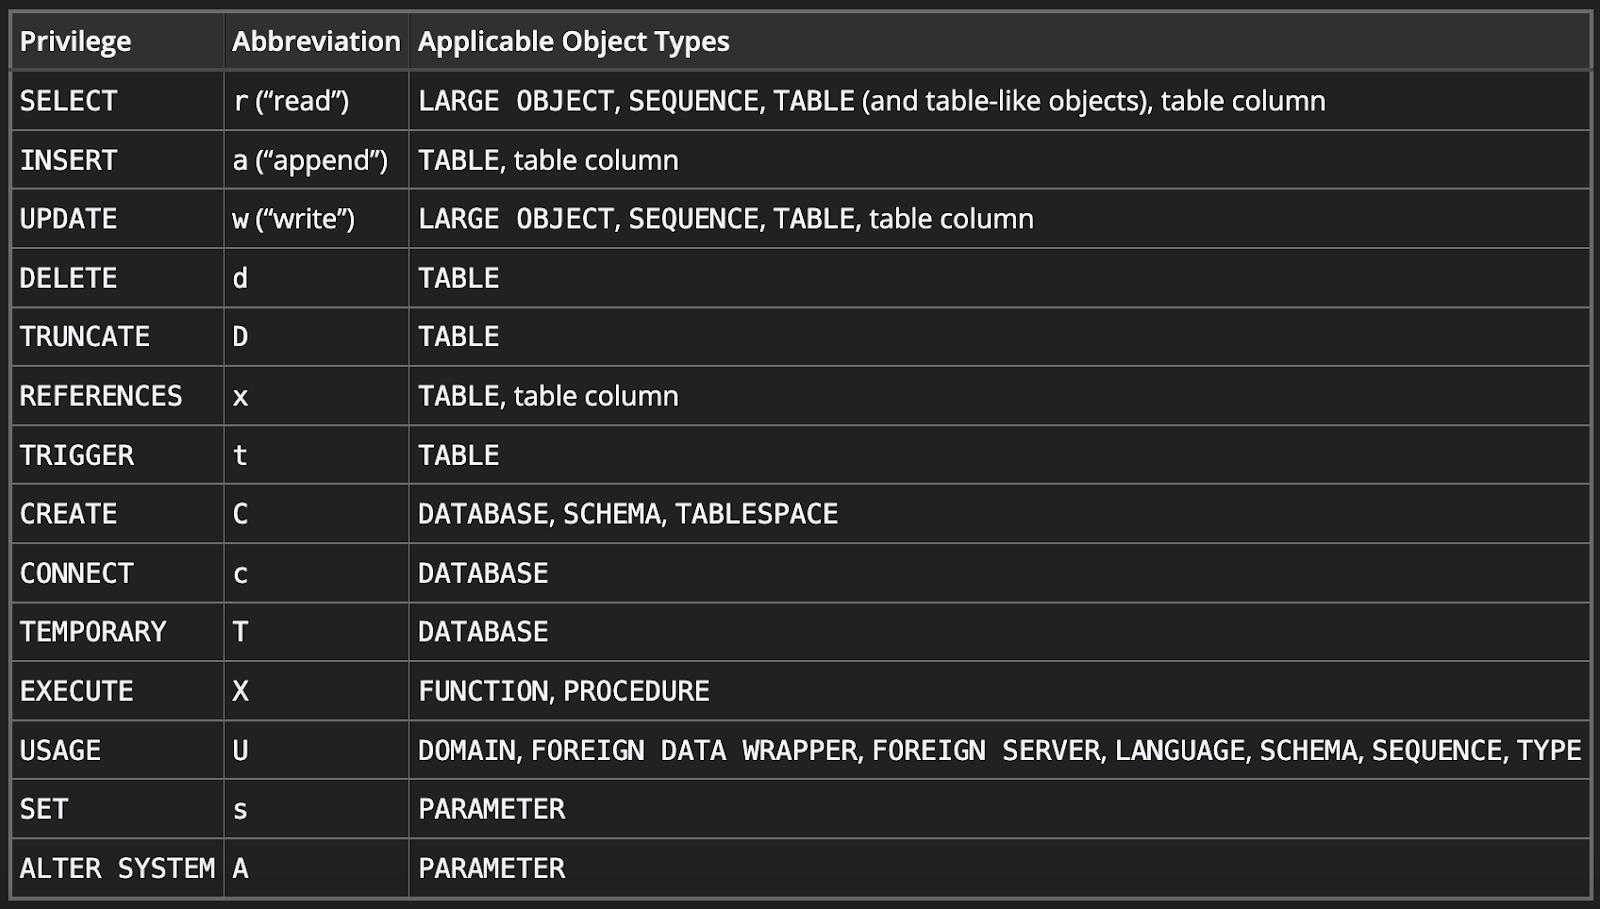
You want to give your “zapier” user the bare minimum of necessary privileges. In this example, it will only need read access to the products table.
Grant the Below Privileges to Your “zapier” User:
_10-- optional if the table is in the “public” schema_10grant usage on schema public to zapier;_10_10-- Grant SELECT privilege on the table_10grant select on table products to “zapier”;
If you enabled RLS for your table, you will also need to create policies for zapier.
_10create policy "zapier can read from products table"_10on public.products_10for select_10to "zapier"_10using (_10 true_10);
With the following privileges set, you can connect to Zapier.
Configuring your Zap:
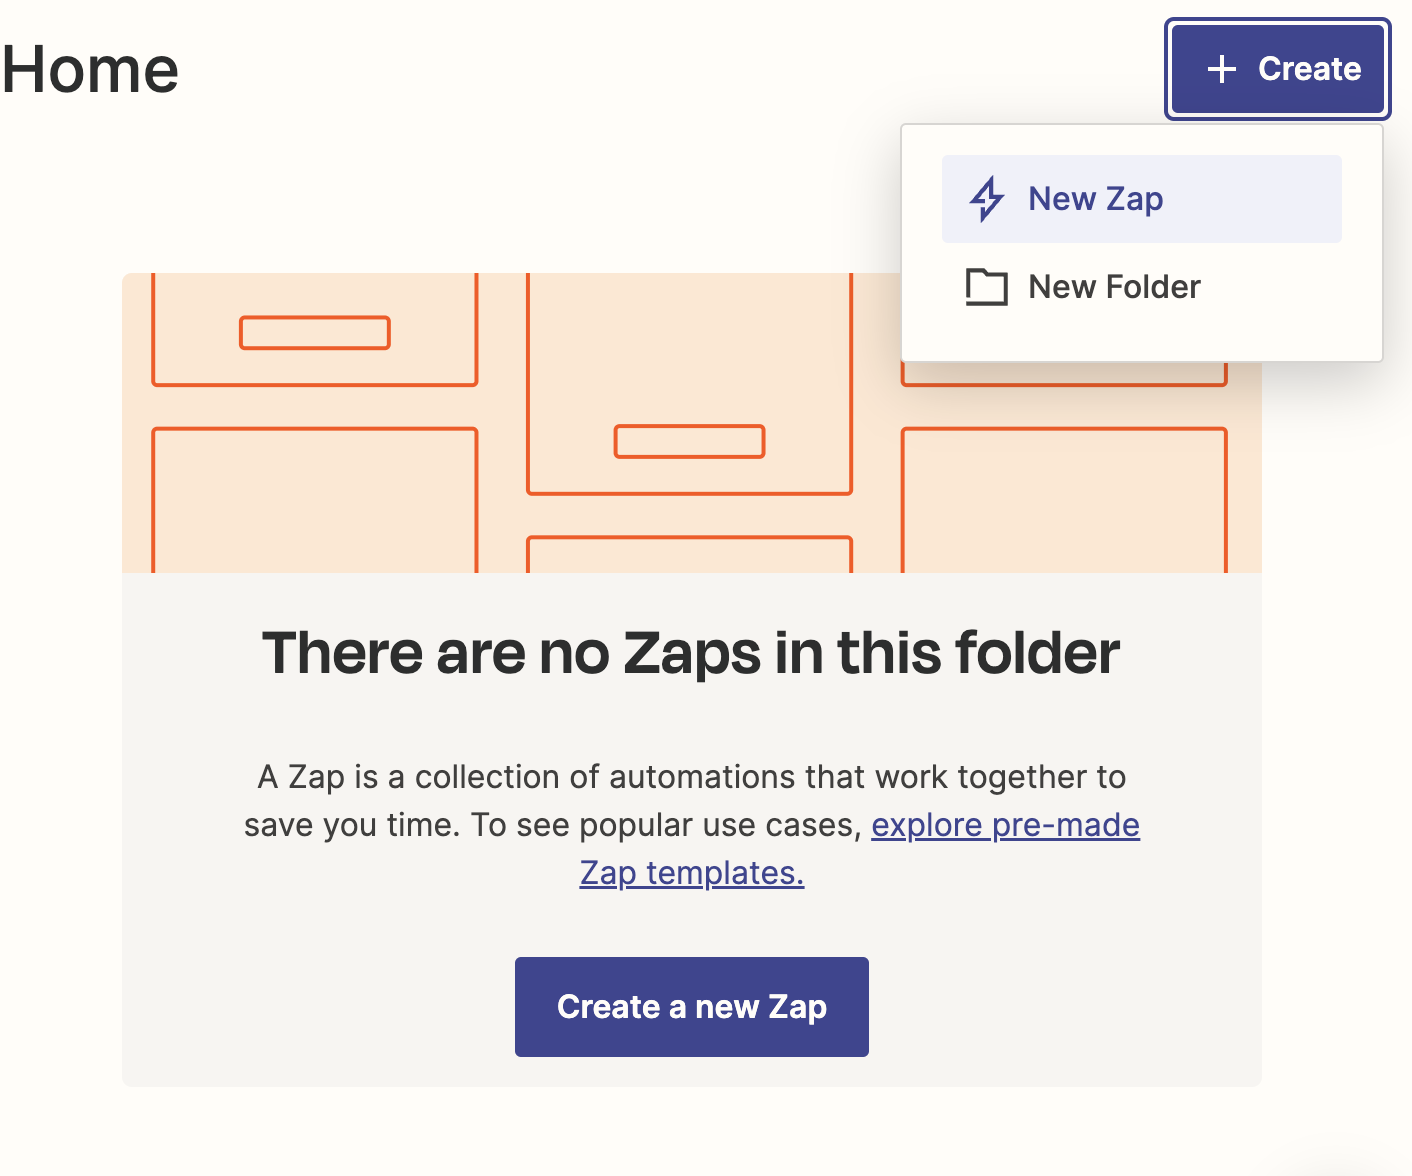
In Zapier, Create a New Zap:
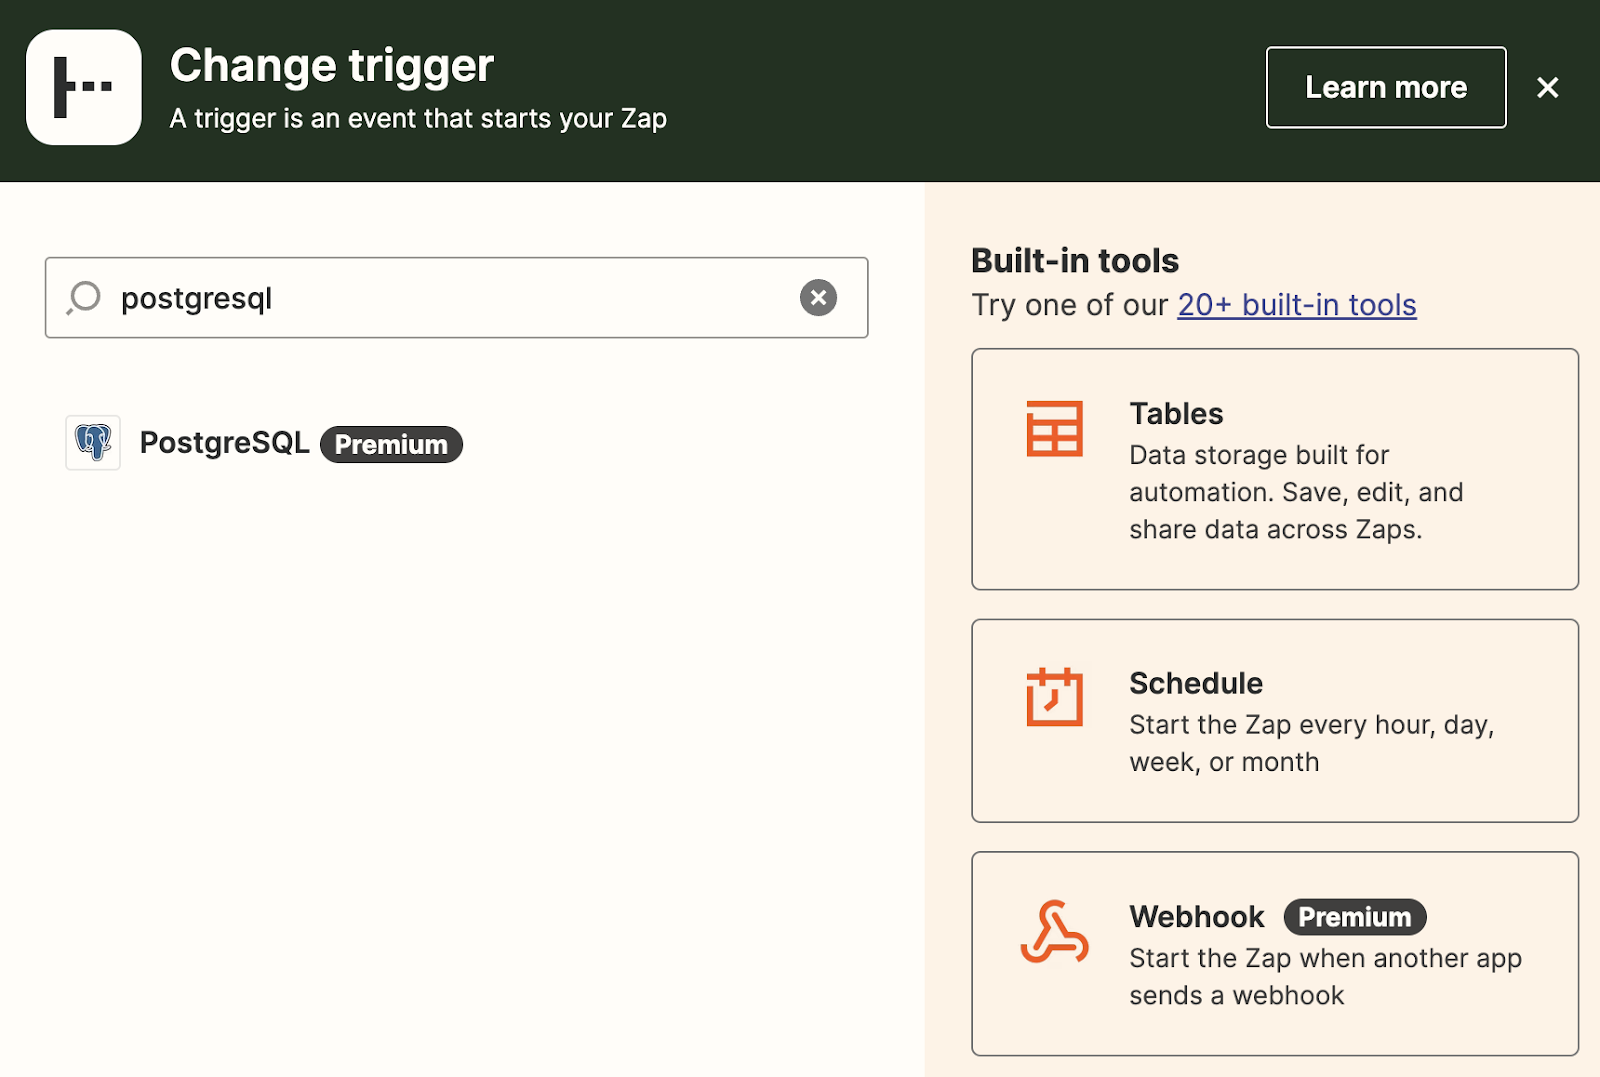
Select PostgreSQL as Your Trigger:
Connect PostgreSQL to Zapier:
You will be prompted to connect your PostgreSQL instance to Zapier. You will need the following credentials:
- Host
- Port
- Database
- Schema
- Username
- Password
- SSL Certificate
You can find your host, port, and database in your Dashboard’s Database Settings:

You can enter your zapier.<project id> as your user and the password you created earlier in the tutorial.
Further down in the Dashboard’s Database Settings, you will see the option to download an SSL certificate. This certificate is necessary to prevent snooping and man-in-the-middle attacks.
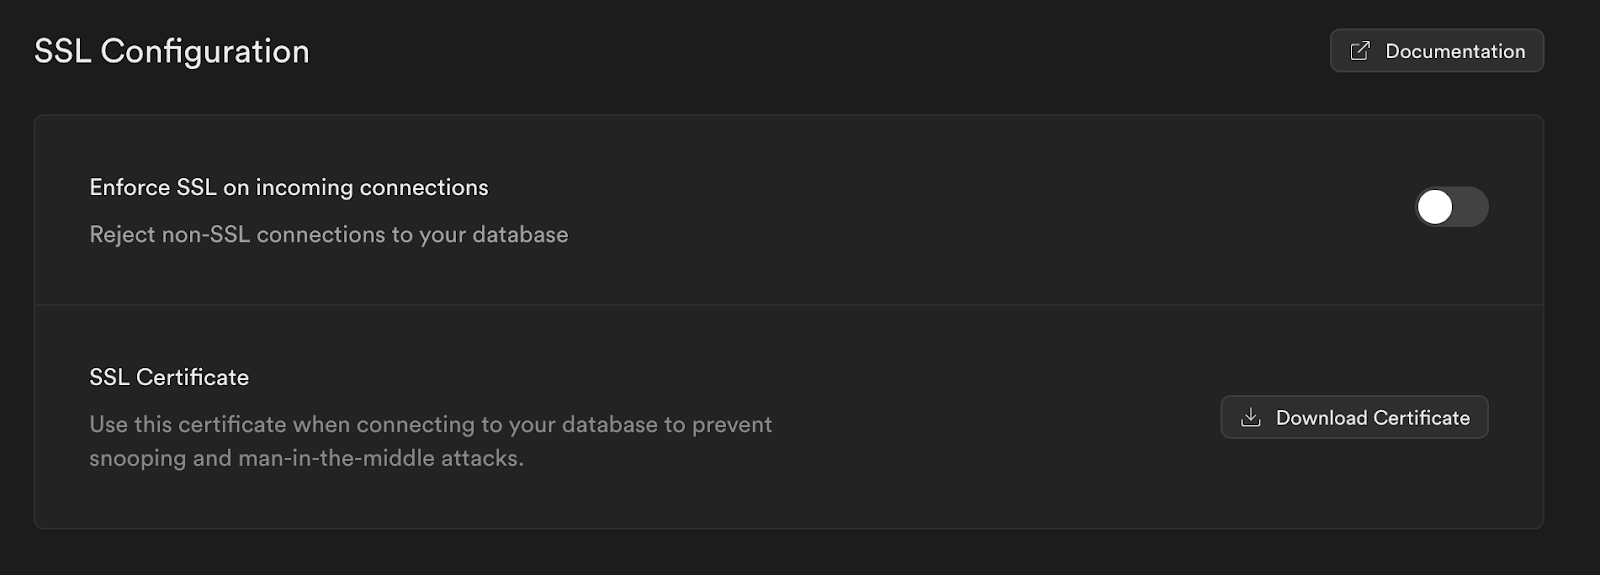
After connecting your instance, Zapier will allow you to define the event that triggers your Zap.
Choose Your Trigger Event (Select Custom Query):
Possible PostgreSQL/Zapier trigger events
It will prompt you to insert a trigger query.
Insert the Following SQL:
_10select * from "products" where "stock_quantity" <= 10;
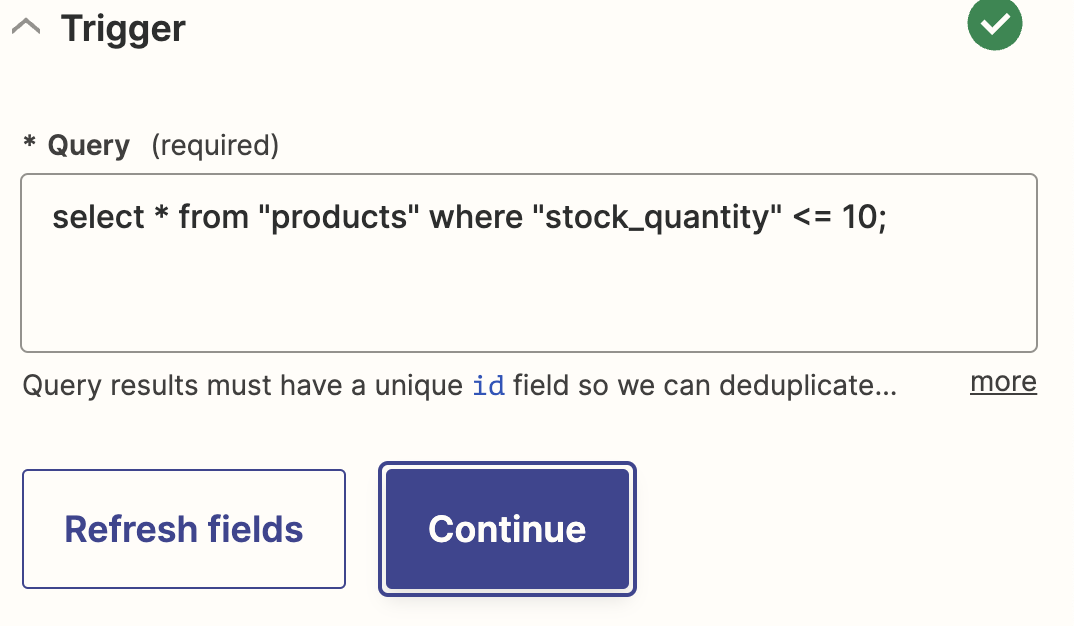
Finally, it will ask you to perform a test using a row it received from your table. The only row that should have returned should be for the “Ultra Ball” product.
Select a Product and go to the Next Step:
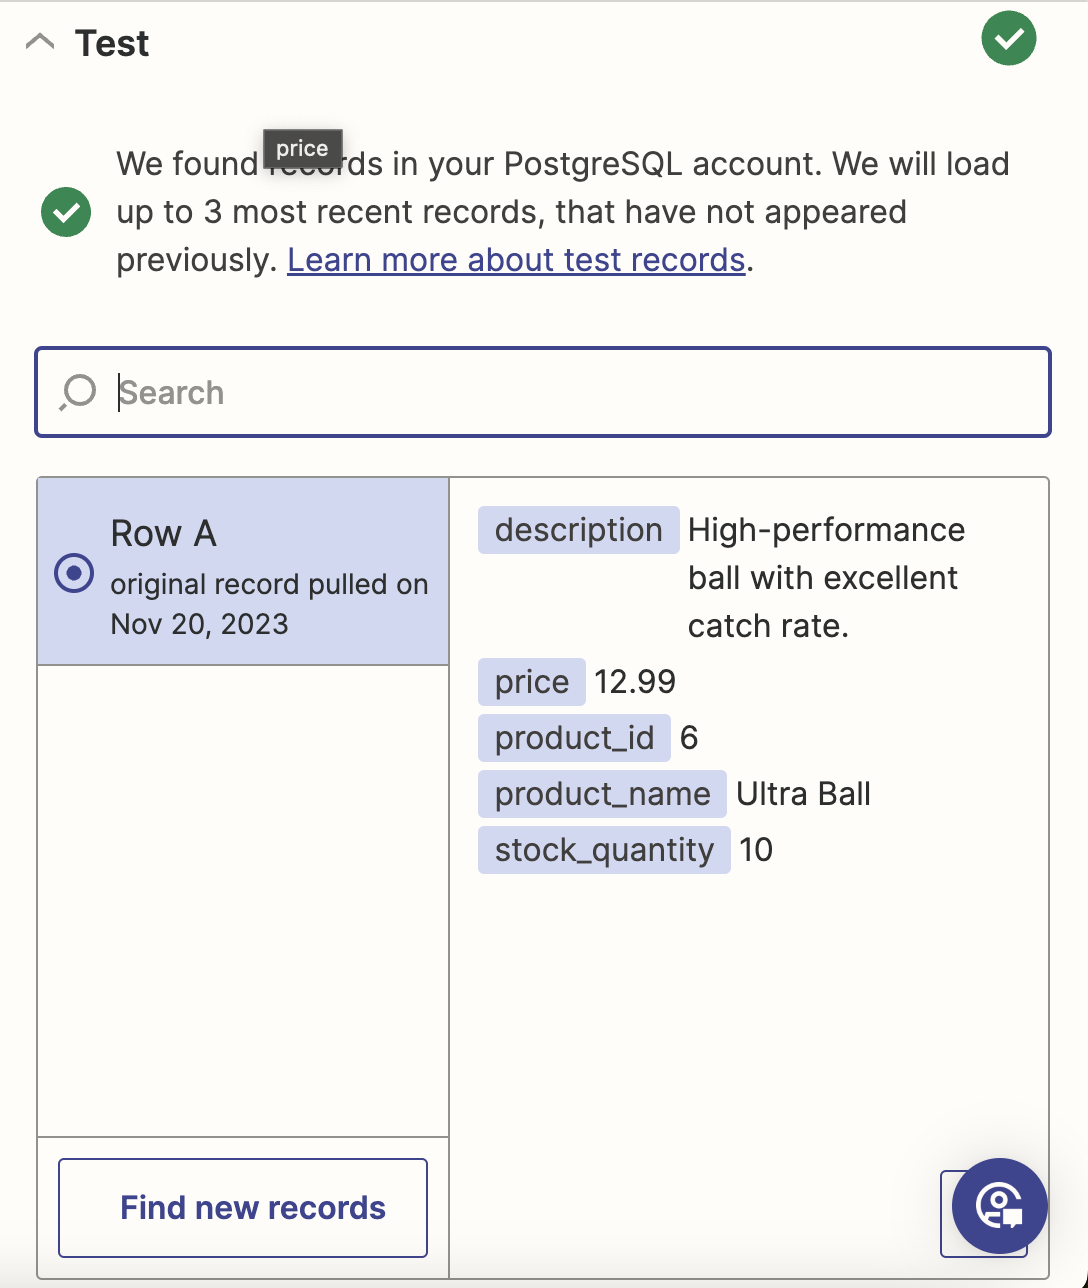
You should be prompted to pick an application for an event to occur in after a trigger happens.
Select Gmail for the App and Send Email for the Event:

Connect Your Gmail Account to Zapier:
Finally, it will ask you to compose an email with the values from your PostgreSQL table. I chose to make the below message, but you can format it however you want.
Format Your Message:
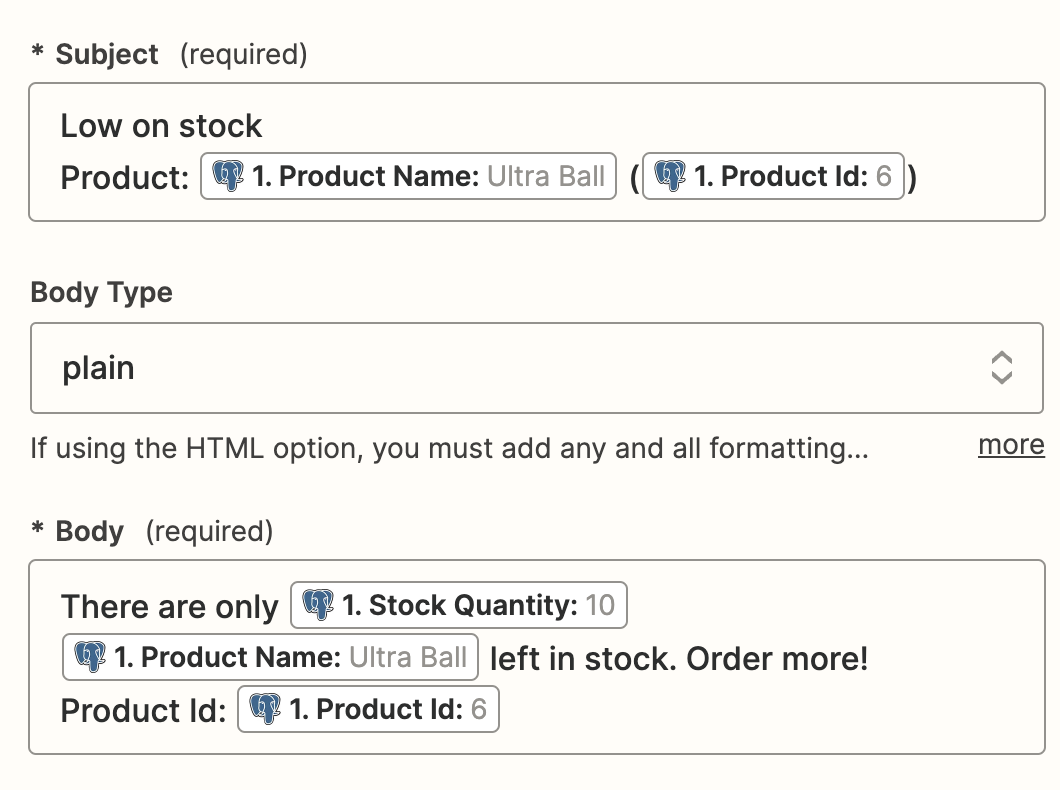
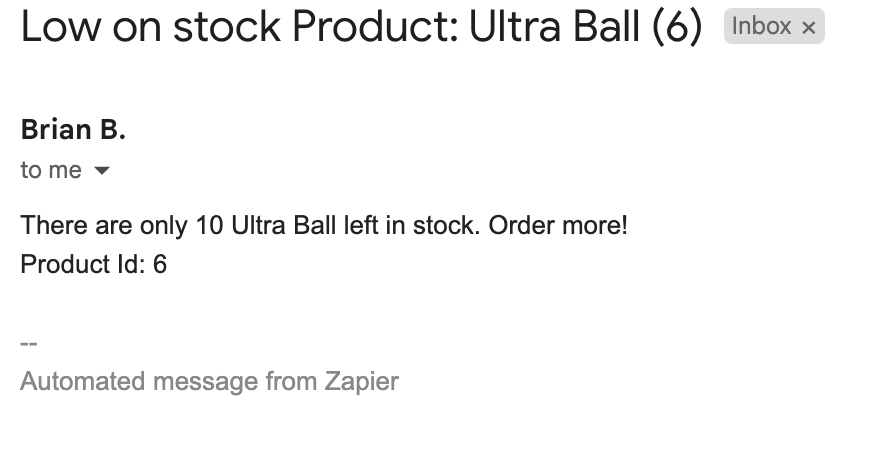
Viola! You can now run a test in Zapier and publish your Zap. Depending on where you sent the test email, you may receive a message like the following:
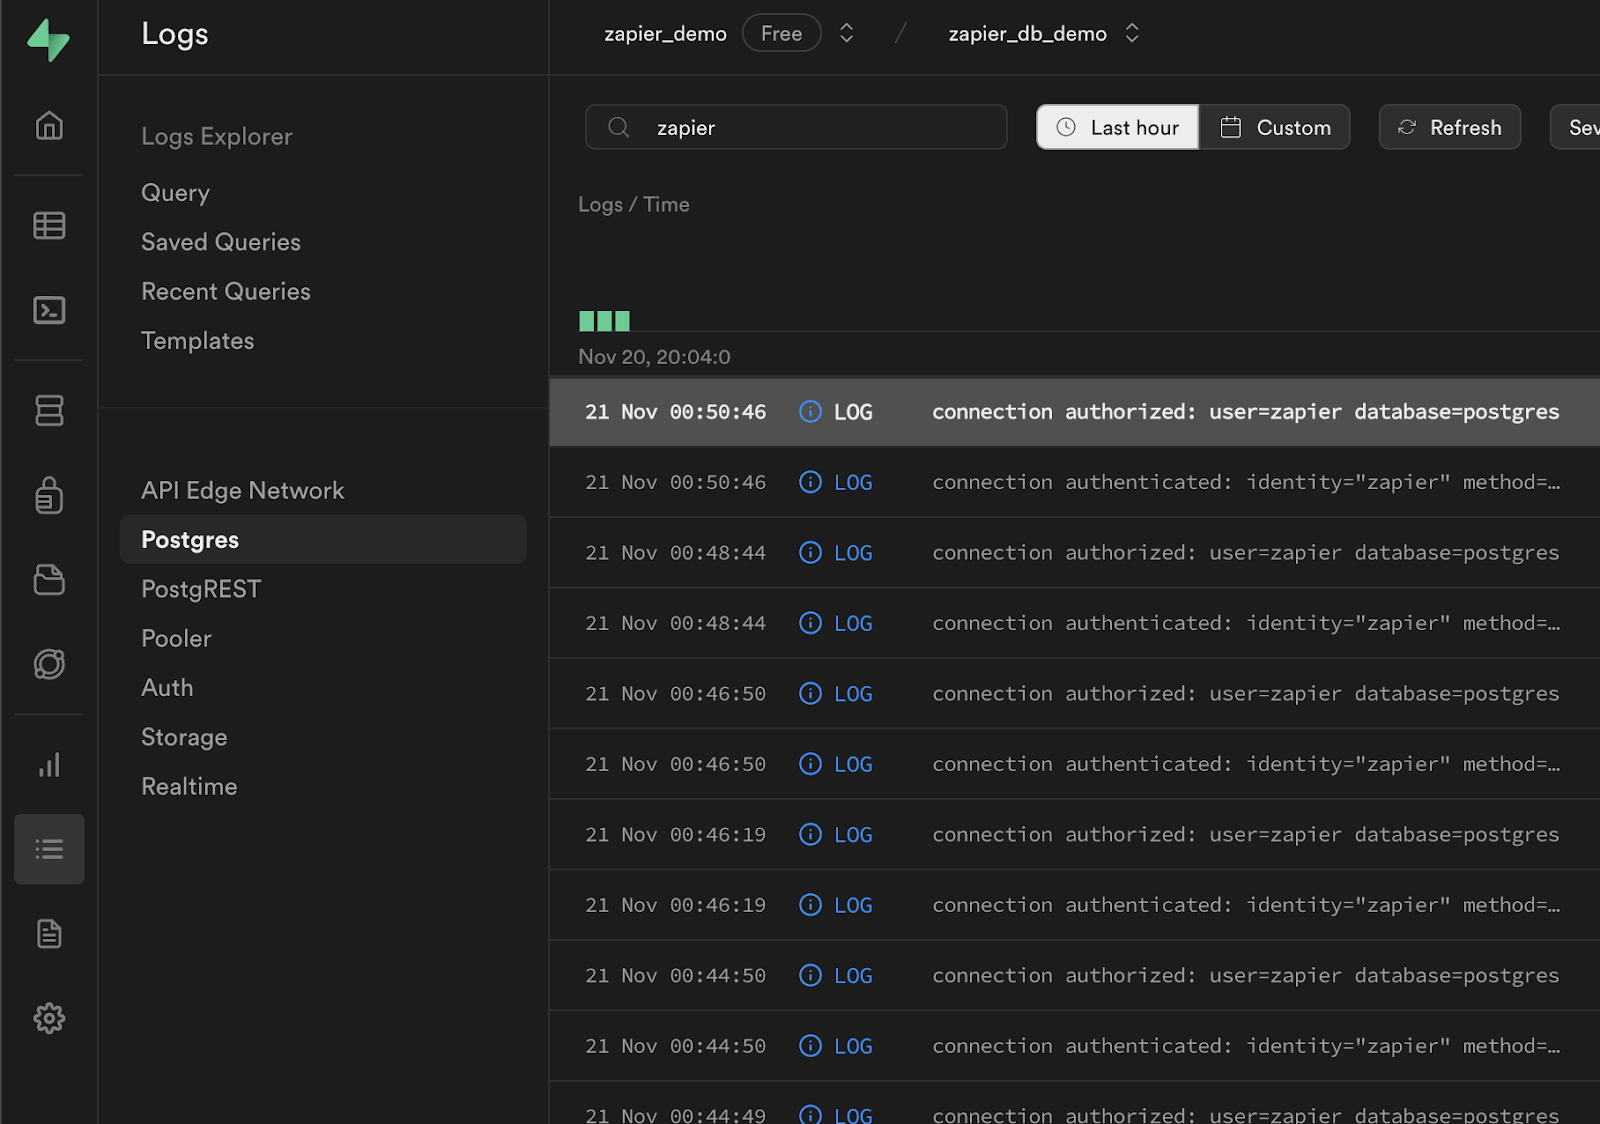
In your Dashboard’s Postgres Logs, you should be able to see when Zapier connects:
Clean up
In case you want to drop your “zapier” user, you can do so with the following queries:
_10revoke select on table "products" from "zapier";_10drop user "zapier";
The Limitations of Zapier:
Non-Destructive Observations and Actions Only:
As discussed earlier, Zapier is only capable of monitoring non-destructive actions. It can observe when rows are updated, or when columns or tables are created, but it is unable to see when they’re deleted/dropped. Similarly, Zapier cannot be used to destroy objects within your database.
Limited Polling Frequency:
Another concern is how frequently Zapier makes observations. Within the advanced settings, you can configure Zapier to observe your database as frequently as every 2 minutes, or as infrequently as every 15. Many users, though, need a broader window of observation.
Max Observable Rows:
Zapier is capable of observing only the 50 most recently created rows when using the "New Row" trigger. So, if more than 50 rows are added in a polling interval, some data will be ignored.
Alternatives to Zapier:
The value of Zapier is that it can bridge together practically any service, making your life as a developer relatively simple. Even with its limitations, it is a robust and reliable solution. However, other integrations are available that may be more suitable for your workload.
n8n, like Zapier, offers simple, no-code connectors (760 to be exact), but it is open source and can be self-hosted.
Other workflow automation alternatives that have partnered with Supabase include Sequin.io and Brackets.
If you just need to trigger outside services when database events occur, you could also leverage Supabase Webhooks! If the requests need to be scheduled, then this could be implemented natively with only PostgreSQL through the pg_cron extension in tandem with either the pg_net or http extensions.
Conclusion
In this walkthrough, we learned how to connect Zapier and Supabase, but also about the alternative solutions that may meet our integration needs
Details
Third-party integrations and docs are managed by Supabase partners.