Plasmic


Overview
By integrating Supabase with Plasmic — a visual builder for the web — you can create data-backed applications without writing code. Although many users leverage Plasmic for rapid landing page development, this tutorial demonstrates its power as a general-purpose visual builder for React, enabling the creation of fully featured read-write applications.
Documentation
In this guide, we’ll walk you through building a crowd-sourced Pokémon Pokédex by connecting Supabase, an open-source Firebase alternative, with Plasmic, a visual web builder.
Live demo (signing up is quick):
https://plasmic-supabase-demo.vercel.app
Repository:
https://github.com/plasmicapp/plasmic/tree/master/examples/supabase-demo
Plasmic project:
https://studio.plasmic.app/projects/66RKaSPCwKxYjCfXWHCxn6
At a high level:
- Supabase serves as the backend (powered by Postgres) for storing Pokémon data and managing authentication. Our code base includes React components for querying the database, displaying data, and handling user sessions.
- Plasmic is used to build the application’s pages and design its visual layout. We import our Supabase components into Plasmic Studio, where they can be visually arranged and configured (for instance, to display data).
- Plasmic-designed pages are rendered back into the Next.js application.
Step 1: Set up your Backend on Supabase
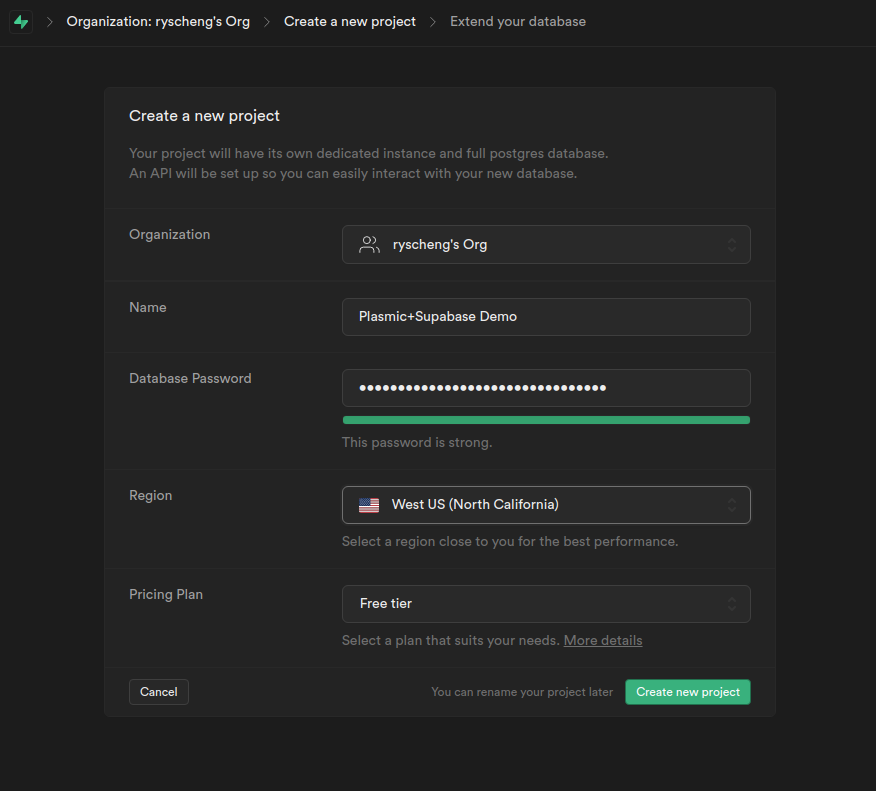
- On the Supabase dashboard, click New project and give your project a name.
By default, Supabase configures email-based signups, storing users in the users table.
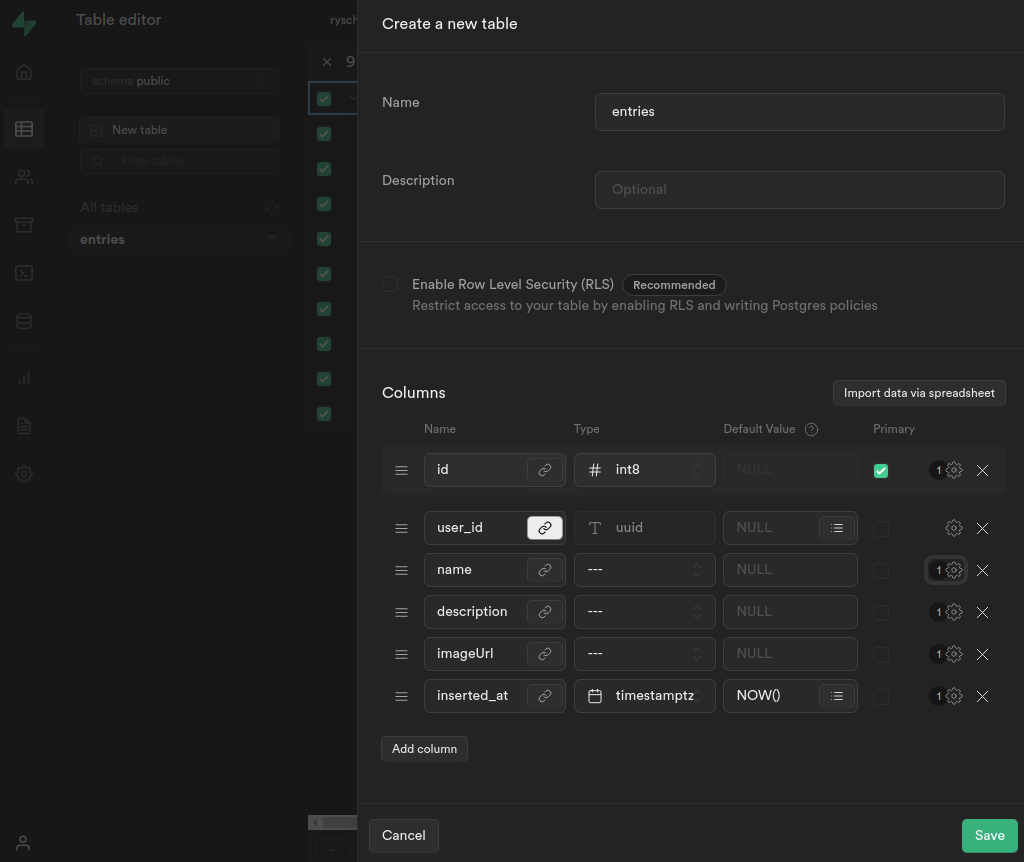
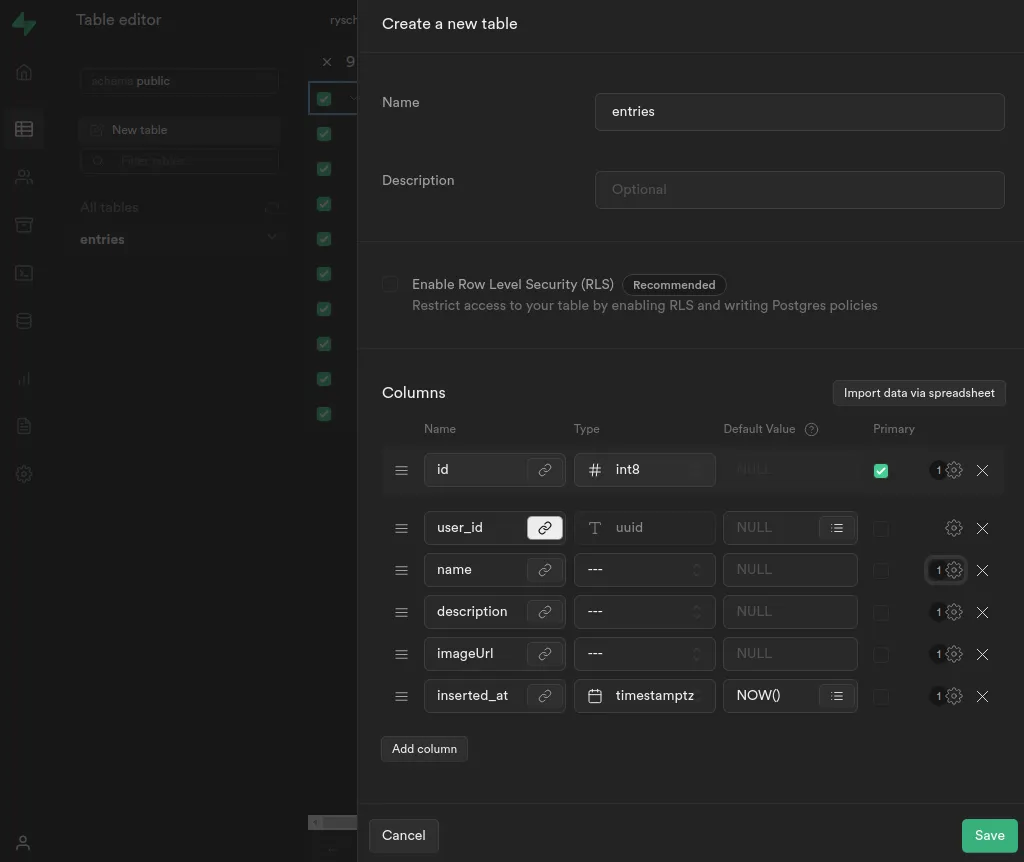
- Navigate to the Table Editor in the left sidebar. Here, create a New table to store your Pokémon entries. Ensure you are in the
schema publicview and create a table calledentrieswith six columns:id: A unique identifier for the entry, automatically generated as the primary column.user_id: Create a relation to the user table by clicking the link 🔗 icon next to the column name and selecting theidcolumn from theusertable.name,description,imageUrl: These columns store the Pokémon’s name, description, and image URL respectively.inserted_at: Automatically populated with the timestamp when the row is first inserted.
Note: In this tutorial, we’ve turned off Row Level Security (RLS). In a production environment, you should create policies that restrict who can create, edit, and delete posts. With RLS off, any user can modify the database without restrictions.
For convenience, you can import the following CSV file into Supabase to pre-populate your database. To import, select Import data via spreadsheet in the new table dialog box (this does not work on existing tables):
You’ll also need to create a function in your database to fetch the schema. This function will retrieve the Supabase database schema to display the table and column names in Plasmic Studio.
To do this, navigate to Database → Functions and click Add a new function.
Use get_table_info as the function name and leave the schema as public. In the Return type field, select JSON.
Paste the following function definition:
_83DECLARE_83 result json;_83BEGIN_83 WITH tables AS (_83 SELECT c.oid :: int8 AS id,_83 nc.nspname AS schema,_83 c.relname AS name,_83 obj_description(c.oid) AS comment_83 FROM pg_namespace nc_83 JOIN pg_class c_83 ON nc.oid = c.relnamespace_83 WHERE c.relkind IN ( 'r', 'p' )_83 AND_83 ( pg_has_role(c.relowner, 'USAGE')_83 OR has_table_privilege(c.oid,_83 'SELECT, INSERT, UPDATE, DELETE, TRUNCATE, REFERENCES, TRIGGER')_83 OR has_any_column_privilege(c.oid, 'SELECT, INSERT, UPDATE, REFERENCES')_83 )_83 ),_83 columns AS (_83 SELECT c.table_schema AS schema,_83 c.table_name AS table,_83 c.column_name AS name,_83 c.column_default AS default,_83 c.data_type,_83 c.udt_name AS format,_83 (c.is_identity = 'YES') AS is_identity,_83 (c.is_updatable = 'YES') AS is_updatable,_83 CASE_83 WHEN pk.column_name IS NOT NULL THEN TRUE_83 ELSE FALSE_83 END AS is_primary_key,_83 array_to_json(array_83 (SELECT e.enumlabel_83 FROM pg_enum e_83 JOIN pg_type t ON e.enumtypid = t.oid_83 WHERE t.typname = udt_name_83 ORDER BY e.enumsortorder)) AS enums_83 FROM information_schema.columns c_83 LEFT JOIN_83 (SELECT ku.table_catalog,_83 ku.table_schema,_83 ku.table_name,_83 ku.column_name_83 FROM information_schema.table_constraints AS tc_83 INNER JOIN information_schema.key_column_usage AS ku ON tc.constraint_type = 'PRIMARY KEY'_83 AND tc.constraint_name = ku.constraint_name) pk ON c.table_catalog = pk.table_catalog_83 AND c.table_schema = pk.table_schema_83 AND c.table_name = pk.table_name_83 AND c.column_name = pk.column_name_83 )_83 SELECT json_agg(t)_83 INTO result_83 FROM (_83 SELECT_83 name,_83 COALESCE(_83 (_83 SELECT_83 array_agg(_83 row_to_json(columns)_83 ) FILTER (_83 WHERE_83 columns.schema = tables.schema AND columns.table = tables.name_83 )_83 FROM_83 columns_83 ),_83 '{}'::json[]_83 ) AS columns_83 FROM_83 tables_83 WHERE_83 schema NOT IN (_83 'information_schema', 'pg_catalog',_83 'pg_temp_1', 'pg_toast', 'pg_toast_temp_1'_83 ) AND_83 name NOT IN ('buckets',_83 'objects', 'migrations', 's3_multipart_uploads', 's3_multipart_uploads_parts', 'schema_migrations', 'subscription', 'messages')_83 ) t;_83_83 RETURN result;_83END;
Since we’ve disabled RLS for now, ensure that your function is executable by the anonymous user. To do this, navigate to the SQL Editor in the sidebar and run the following query:
_10GRANT EXECUTE ON FUNCTION get_table_info() TO anon;
Important! Make sure to revert this step when you add RLS to your table later.
Step 2: Set up your codebase
We have a working code example available here. This starter project includes all the code components you need to begin querying Supabase through Plasmic Studio.
Code components are React components defined in your code base that we import into Plasmic Studio. Your project is configured to look for these at
http://localhost:3000/plasmic-host. You can use and style these components in your design. Seesupabase-demo/plasmic-init.tsto understand how they are registered with Plasmic.
First, clone the repo to your development machine:
_10git clone --depth=1 git@github.com:plasmicapp/plasmic.git_10cd plasmic/examples/supabase-demo/
Copy .env.example to .env to store your environment variables for the local development server. Then, add your Supabase project’s URL and public key (found in the API tab on the left pane of your Supabase dashboard).
Install the dependencies and fetch the Supabase schema by running:
_10yarn
Now, start the development server (it listens on http://localhost:3000):
_10yarn dev
Step 3: Explore the existing application
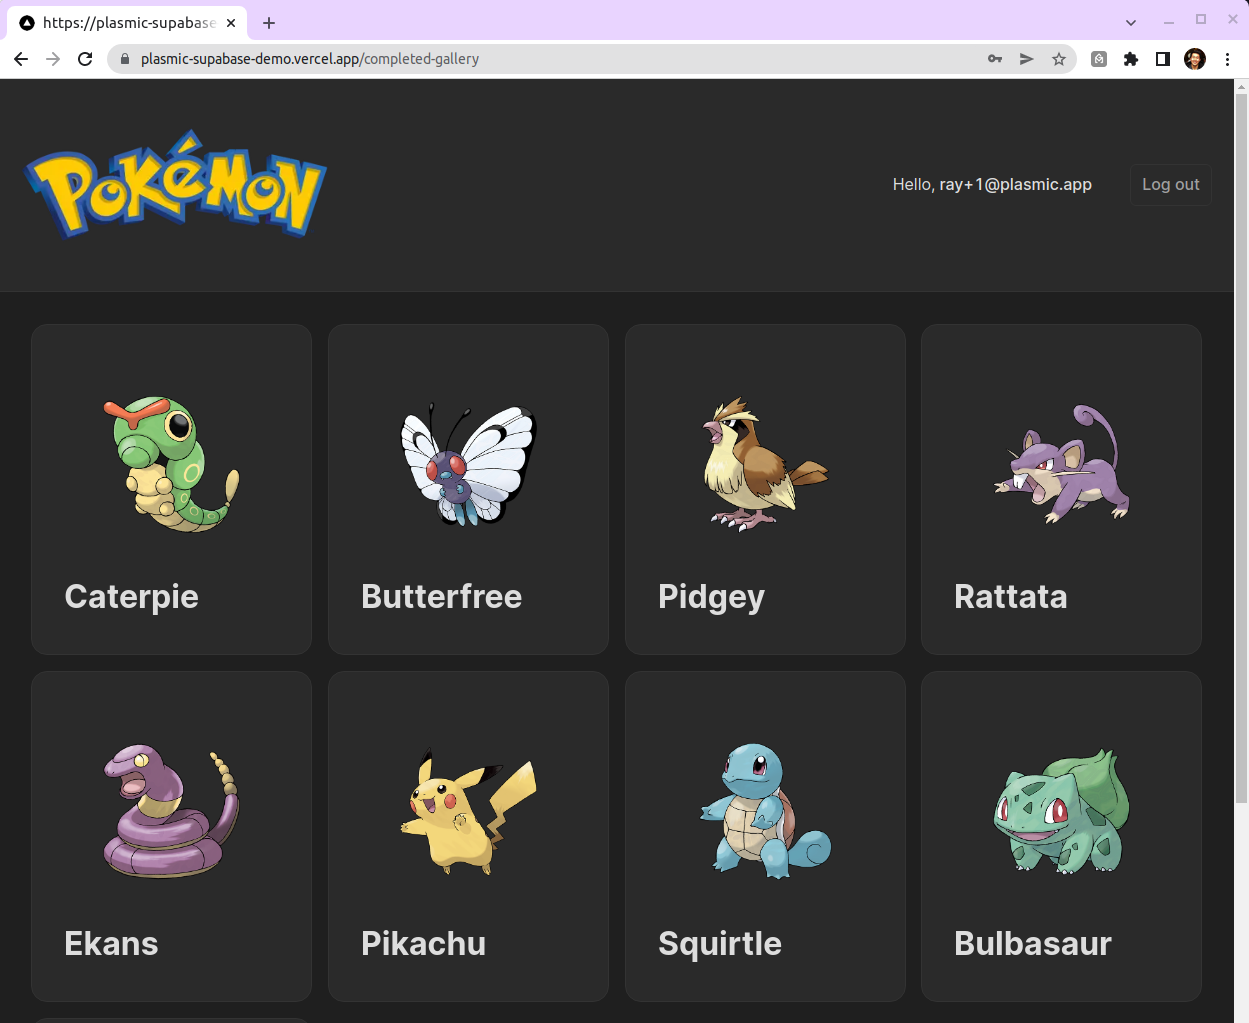
Open http://localhost:3000 in your web browser. The project is already set up for user sign-ups and logins and includes an admin interface for adding and editing Pokémon in the database. Feel free to sign up with your email address and add Pokémon entries. Note that Supabase requires email verification before you can log in.
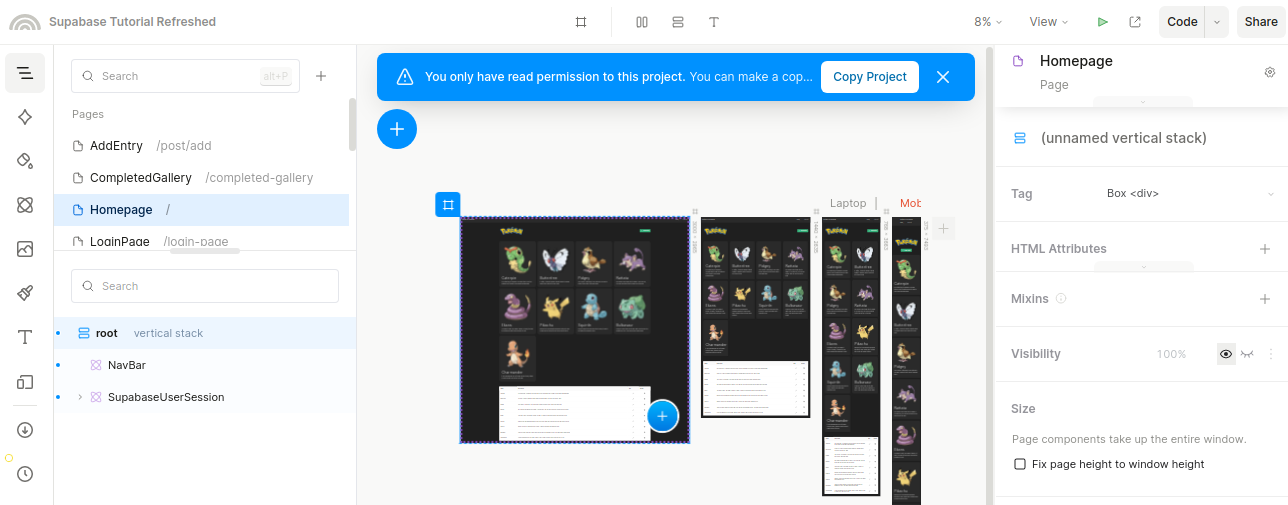
If you pre-populated the database in Step 1, you should see the following homepage after logging in. Otherwise, you can manually add Pokémon via the UI.

Step 4: Clone the Plasmic project
Now, let’s make some enhancements! The code base is initially set up with a read-only copy of the Plasmic project. Let’s create an editable copy first.
Open the default starter Plasmic project here:
https://studio.plasmic.app/projects/66RKaSPCwKxYjCfXWHCxn6
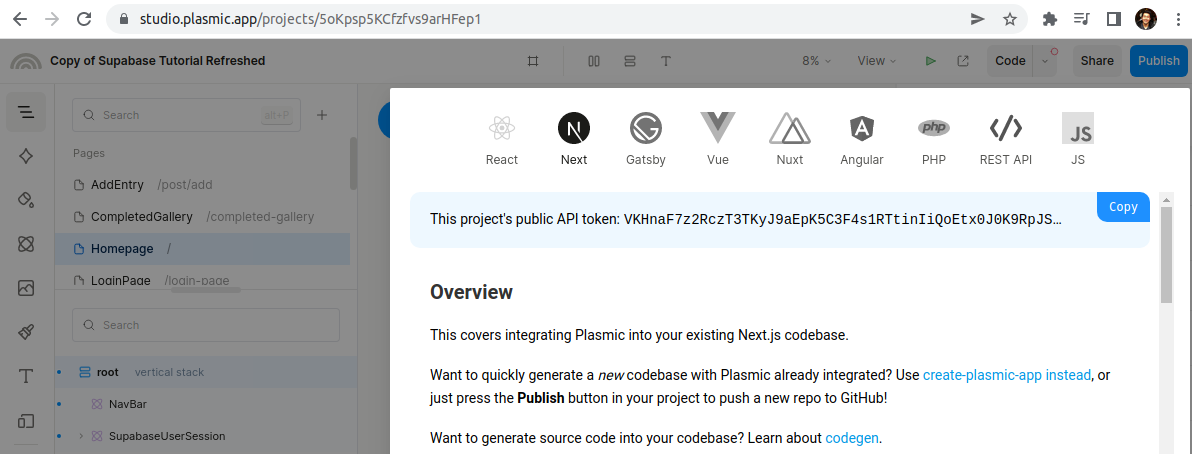
To create an editable copy, click the Copy Project button in the blue bar. This will clone the project and redirect you to your copy.
Step 4a: Configure your code base to use the new Plasmic project
Take note of the project ID and API token. You can find the project ID in the URL:
https://studio.plasmic.app/projects/PROJECTID.
The API token is available by clicking the Code button in the top bar.
Return to .env and update the corresponding project ID and token fields.
Step 4b: Configure your Plasmic project app host
To ensure Plasmic looks for your code components on your development server, update your project’s app host to http://localhost:3000/plasmic-host.
Note: Keep your development server running at http://localhost:3000 for the project to load.
After restarting both the dev server and Plasmic Studio, you should be able to edit both the Studio and your codebase.
Step 4: Deployment (optional)
You can host your application using Vercel, Netlify, AWS, or any other provider you prefer.
In this section, we will cover deployment using Vercel:
- First, create a GitHub repository for your project.
- Next, log into vercel.app and add a new project.
- Point to the repository you created in the first step.
- Go to the project settings.
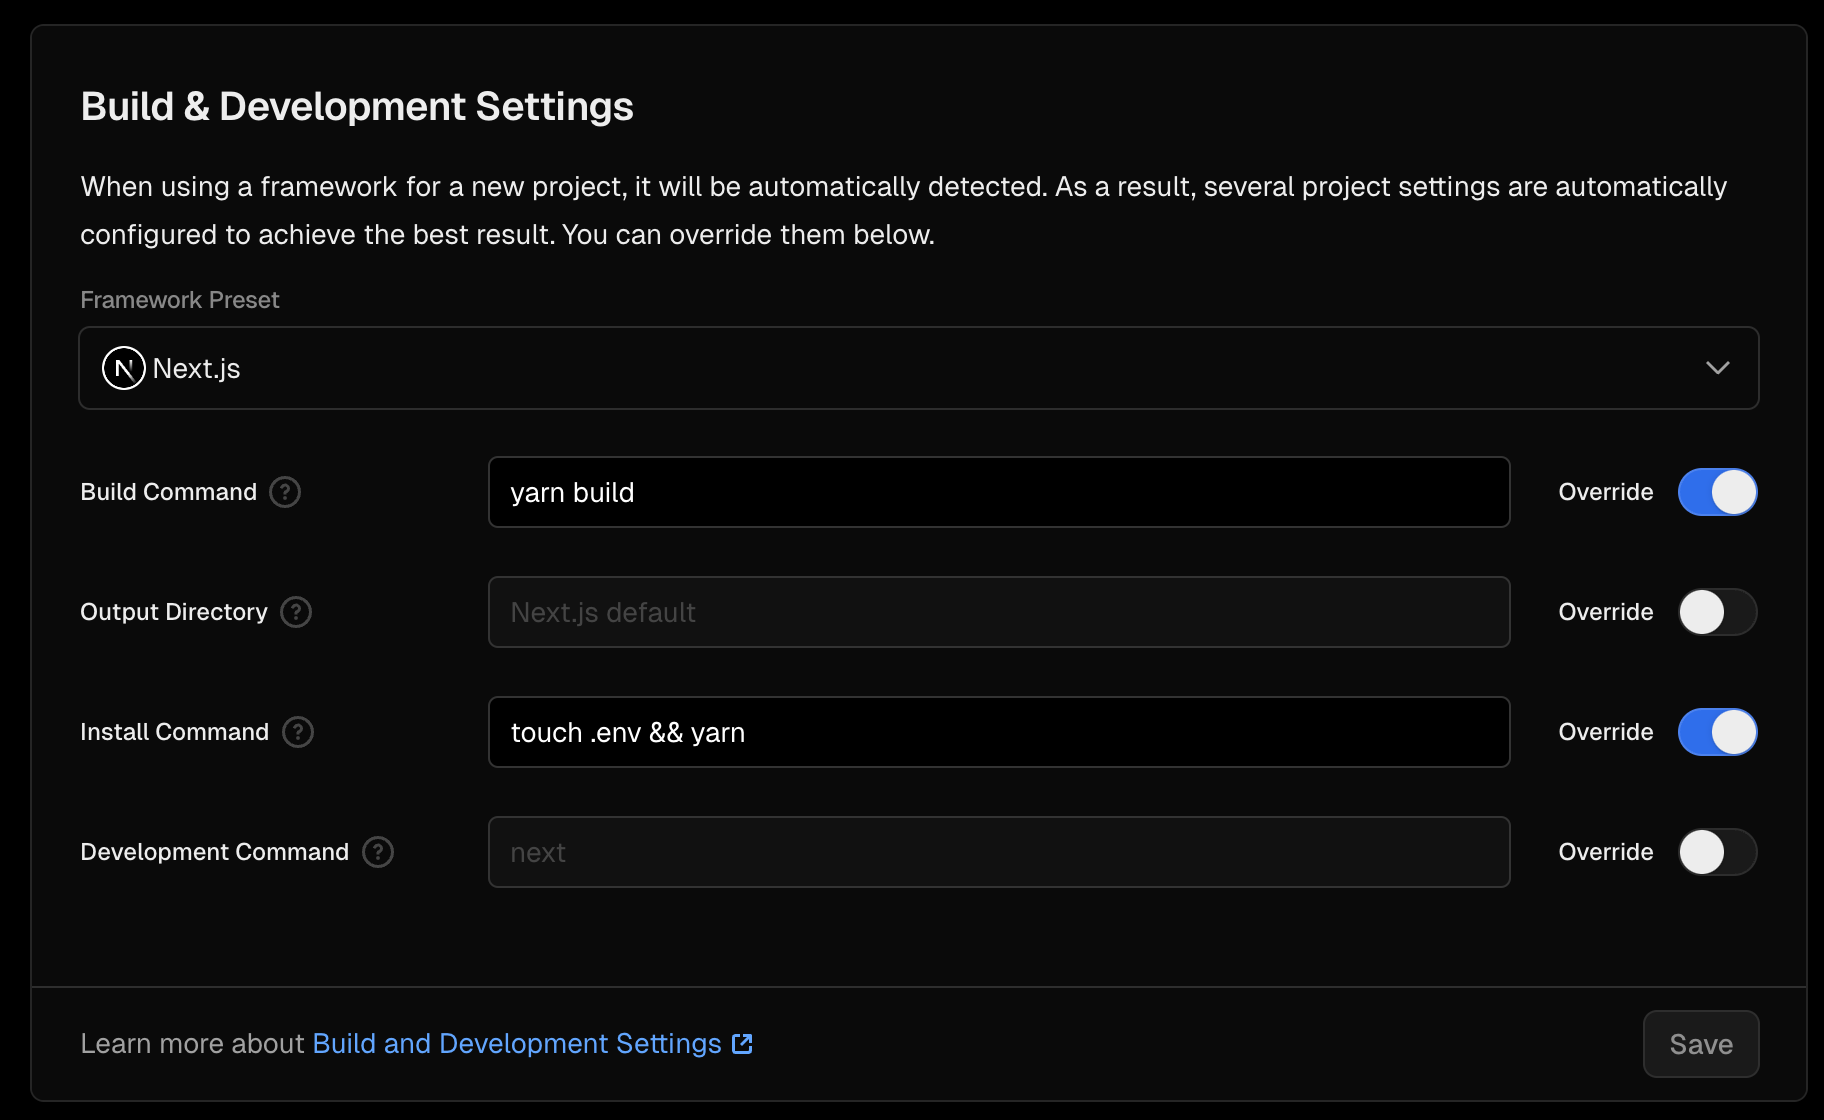
- Set the Build & Development settings to the following:
- Set the Node.js version to 20.x.
- Go to the Environment Variables tab and copy the contents of your .env file.
- Trigger a deployment of your project.
- (optional) go back to step 4b, and point to your /plasmic-host page using your newly created domain. (for example, https://plasmic-supabase-demo.vercel.app/plasmic-host)
You can also refer to this video to see how another project is configured on Vercel and Netlify.
You are not able to use Plasmic hosting for this example, because it uses code components. Plasmic hosting does not have access to your codebase, meaning you would need to host your Next.js server using 3rd party providers.
Step 5: Create a new page – Look up Pokémon by name
Let’s create a lookup page for our Pokédex using the code components from the code base.
- Create a new page called
Guessand set its path to/guess. - Add a NavBar and any additional elements to enhance the layout (we used two vertical containers for background and centering).
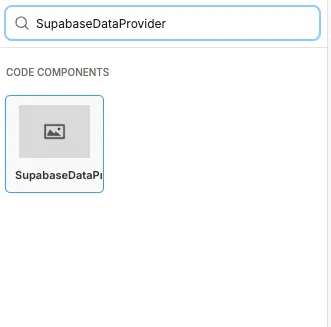
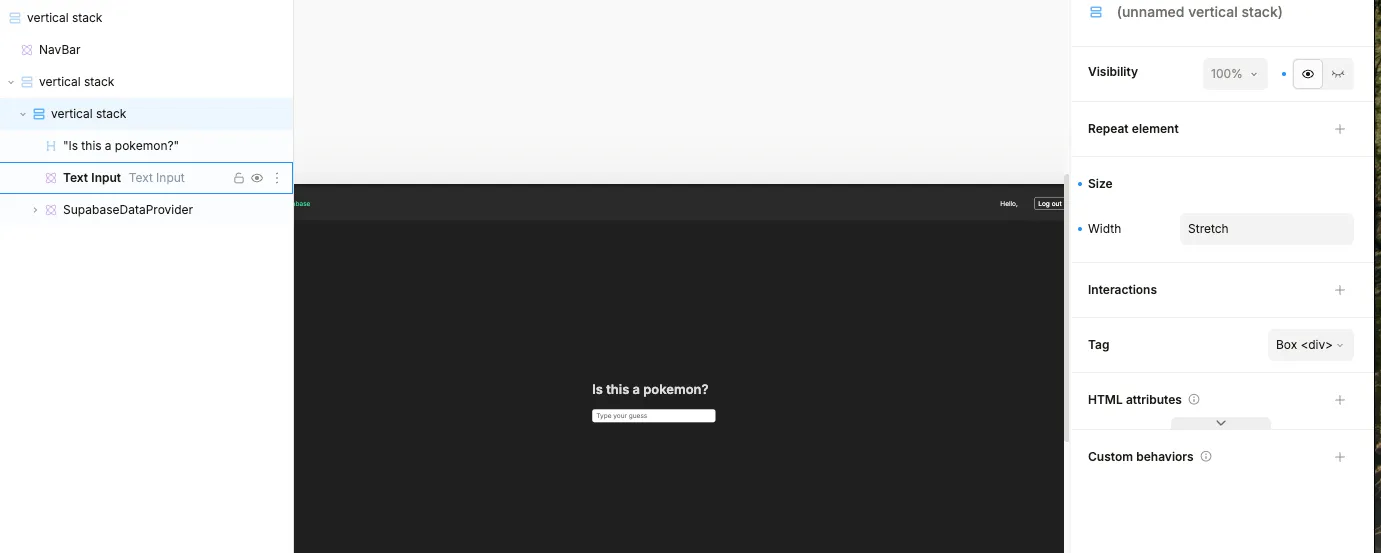
- Insert a
SupabaseDataProviderby opening the AddDrawer (click the blue + button).
For source, see
components/CodeComponents/DatabaseComponents/SupabaseDataProvider.
Above the SupabaseDataProvider, add a text input element and a heading. Change the text input’s placeholder to Type your guess. Your layout should resemble the following:
Next, configure the props for the SupabaseDataProvider in the right-hand panel:
- Table: Set this to the table you created in Supabase.
- Columns: Provide a comma-separated list of the columns you want to select from the table.
- Filters: Define which data to fetch (similar to a WHERE clause).
- Single: Specify whether to fetch a single record or multiple records.
Additionally, we set a visibility condition so that data is fetched only when the input contains more than three characters.
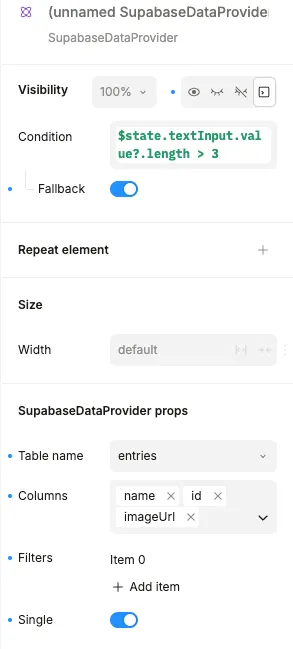
This is how the filter parameter should appear, with the operation set to eq (meaning it will fetch records where the property equals a specific value).
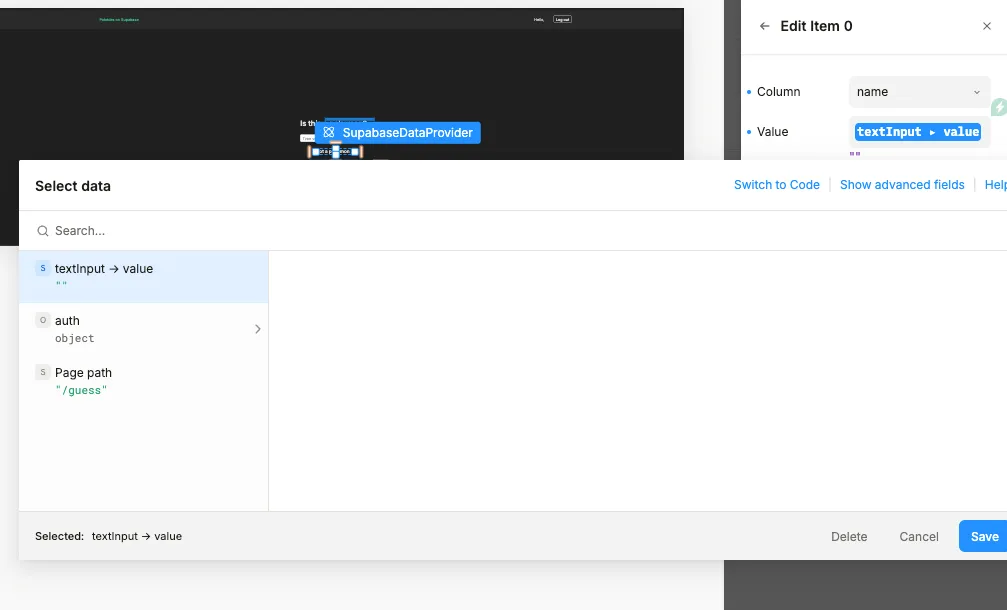
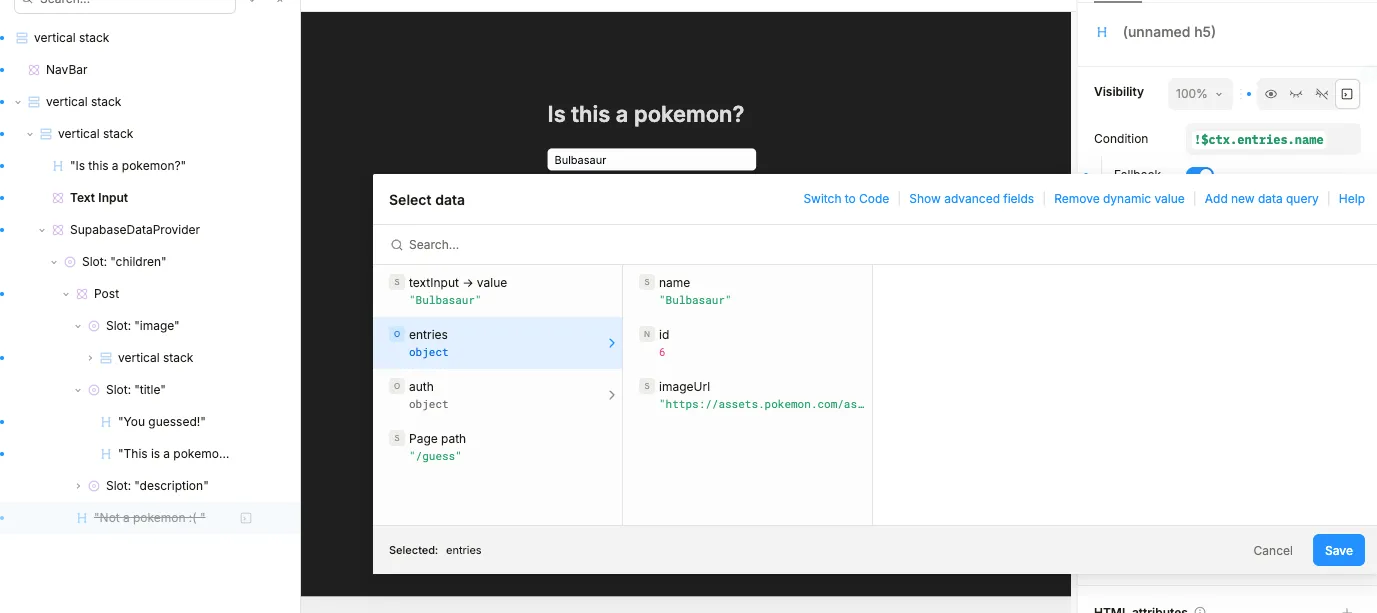
The SupabaseDataProvider passes down the fetched data, leaving it up to you to decide how to use it.
Next, add a Post component (used on the homepage) to display the Pokémon.
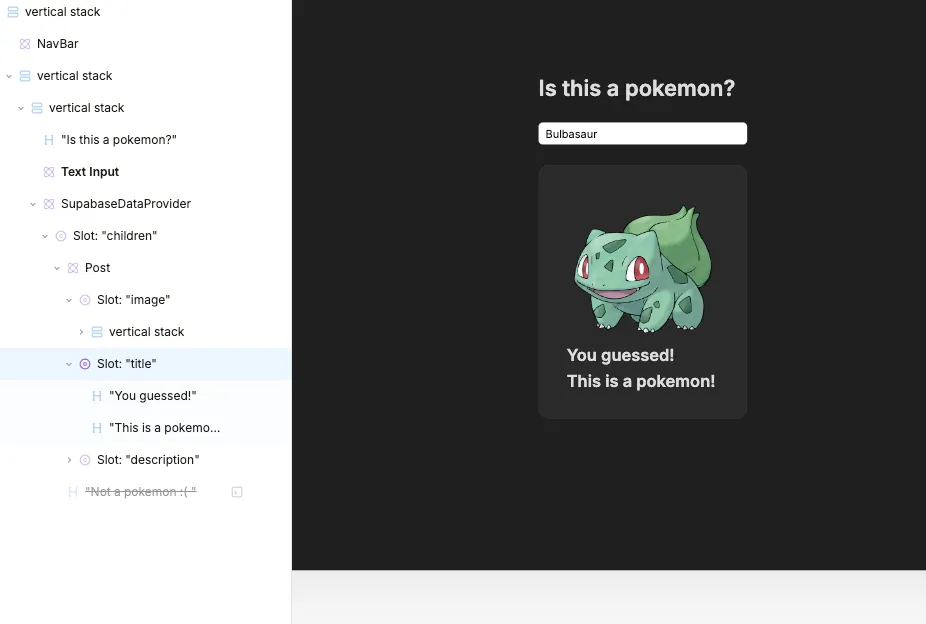
If no matching Pokémon exists in the database, configure a nearby text node to inform the user. Control its visibility based on the data from the SupabaseDataProvider—this is how you can access that data in the Studio:
Finally, add your new page as a link in the NavBar component. Try this as an exercise 🙂
Step 6: Check your dev server
If your development server has been running all along, you’ll notice that the site automatically fetches and rebuilds as you make changes in Plasmic Studio. To restart the dev server, run:
_10yarn dev
Then, view the results at http://localhost:3000/guess
How does this all work under the hood?
All the code components are defined in your codebase, and you’re free to enhance them to support more powerful querying capabilities in Plasmic Studio.
Email Verification API Route
To sign up, users must verify their email address. After signing up, they receive an email with a verification link. Clicking the link directs them to the API route at /pages/api/auth/confirm.ts, which confirms the OTP code and redirects them to the homepage.
Learn more here: https://supabase.com/docs/guides/auth/server-side/nextjs?queryGroups=router&router=pages
SupabaseDataProvider
This simple component executes queries and populates the application's data. If your data is mostly static, consider using usePlasmicQueryData instead of the mutable version.
_85import { Database } from "@/types/supabase";_85import { createSupabaseClient } from "@/util/supabase/component";_85import { Filter, applyFilter, isValidFilter } from "@/util/supabase/helpers";_85import {_85 DataProvider,_85 usePlasmicCanvasContext,_85 useSelector,_85} from "@plasmicapp/loader-nextjs";_85import { useMutablePlasmicQueryData } from "@plasmicapp/query";_85import { ReactNode } from "react";_85_85export interface SupabaseDataProviderProps {_85 children?: ReactNode;_85 tableName?: keyof Database["public"]["Tables"];_85 columns?: string[];_85 className?: string;_85 filters?: any;_85 single?: boolean;_85}_85_85export function SupabaseDataProvider(props: SupabaseDataProviderProps) {_85 const supabase = createSupabaseClient();_85 const inEditor = usePlasmicCanvasContext();_85 // These props are set in the Plasmic Studio_85 const { children, tableName, columns, className, filters, single } = props;_85 const currentUser = useSelector("auth");_85 const validFilters = filters?.filter((f: any) => isValidFilter(f)) as_85 | Filter[]_85 | undefined;_85_85 const selectFields = columns?.join(",") || "";_85_85 // Error messages are currently rendered in the component_85 if (!tableName) {_85 return <p>You need to set the tableName prop</p>;_85 } else if (!selectFields) {_85 return <p>You need to set the columns prop</p>;_85 }_85_85 // Performs the Supabase query_85 async function makeQuery() {_85 // dont perform query if user is not logged in._85 // allow to query in editor mode for demo purposes_85 if (!inEditor && !currentUser?.email) {_85 return;_85 }_85 let query = supabase.from(tableName!).select(selectFields || "");_85 query = applyFilter(query, validFilters);_85 // This is where the Single property comes into play—either querying for a single record or multiple records._85 const { data, error, status } = await (single_85 ? query.single()_85 : query.order("id", { ascending: false }));_85_85 if (error && status !== 406) {_85 throw error;_85 }_85 return data;_85 }_85_85 // The first parameter is a unique cache key for the query._85 // If you want to update the cache - you are able to use the Refresh Data function in the Plasmic Studio._85 const { data } = useMutablePlasmicQueryData(_85 `${tableName}-${JSON.stringify(filters)}`,_85 async () => {_85 try {_85 return await makeQuery();_85 } catch (err) {_85 console.error(err);_85 return {};_85 }_85 // As an additional way to control the cache flow - you are able to specify the revalidate options._85 // For example, you can revalidate the data on mount and on page focus, to make sure that data is always up-to-date._85 // If your data is mostly static - turn these options off._85 },_85 { revalidateOnMount: true, revalidateOnFocus: true }_85 );_85_85 return (_85 <div className={className}>_85 <DataProvider name={tableName} data={data}>_85 {children}_85 </DataProvider>_85 </div>_85 );_85}
How it is registered:
_16// /plasmic-init.ts_16PLASMIC.registerComponent(SupabaseQuery, {_16 name: "SupabaseQuery",_16 providesData: true,_16 props: {_16 children: "slot",_16 tableName: tableNameProp,_16 columns: {_16 ...columnProp,_16 multiSelect: true,_16 },_16 filters: filtersProp,_16 single: "boolean",_16 },_16 importPath: "./components/CodeComponents/DatabaseComponents",_16});
The shared props for this registration are defined below. We use the dbSchema variable from an auto-generated file that fetches the Supabase schema. This file refreshes during yarn build or when you run yarn, allowing the Studio to display current tables and columns without hardcoding them.
_37const tableNameProp = {_37 type: "choice" as const,_37 multiSelect: false,_37 options: dbSchema.map((table) => table.name) || [],_37};_37_37const columnProp = {_37 type: "choice" as const,_37 options: (props: any) => {_37 const table = dbSchema.find((t) => t.name === props.tableName);_37 return table?.columns?.map((column) => column.name) ?? [];_37 },_37};_37_37const filtersProp = {_37 type: "array" as const,_37 nameFunc: (item: any) => item.name || item.key,_37 itemType: {_37 type: "object" as const,_37 fields: {_37 name: {_37 type: "choice" as const,_37 options: ["eq", "match"],_37 },_37 args: {_37 type: "array" as const,_37 itemType: {_37 type: "object" as const,_37 fields: {_37 column: columnProp,_37 value: "string" as const,_37 },_37 },_37 },_37 },_37 },_37};
SupabaseForm
This component performs database mutations (such as delete, update, or insert operations). It wraps form elements and calls an action upon submission. In most cases, a submit button triggers the form, and the onSuccess hook is useful for redirecting the user or refreshing page data.
_77import { Database } from "@/types/supabase";_77import { createSupabaseClient } from "@/util/supabase/component";_77import { Filter, applyFilter, isValidFilter } from "@/util/supabase/helpers";_77import React, { ReactNode } from "react";_77_77export interface SupabaseFormProps {_77 children?: ReactNode;_77 tableName?: keyof Database["public"]["Tables"];_77 method?: "upsert" | "insert" | "update" | "delete";_77 filters?: any;_77 data?: any;_77 onSuccess?: () => void;_77 className?: string;_77}_77export function SupabaseForm(props: SupabaseFormProps) {_77 const { children, tableName, method, filters, data, className, onSuccess } =_77 props;_77 const supabase = createSupabaseClient();_77_77 if (!tableName) {_77 return <p>You need to set the tableName prop</p>;_77 }_77 if (!method) {_77 return <p>You need to choose a method</p>;_77 }_77_77 if (method !== "delete" && !data) {_77 return <p>You need to set the data prop</p>;_77 }_77_77 const validFilters = filters?.filter((f: any) => isValidFilter(f)) as_77 | Filter[]_77 | undefined;_77_77 async function onSubmit(e: React.FormEvent) {_77 e?.preventDefault();_77 try {_77 const table = supabase.from(tableName!);_77 let query: any;_77 switch (method) {_77 case "update": {_77 query = table.update(data);_77 break;_77 }_77 case "upsert": {_77 query = table.upsert(data);_77 }_77 case "insert": {_77 query = table.insert(data);_77 }_77 case "delete": {_77 query = table.delete();_77 }_77 default: {_77 throw new Error("Invalid method");_77 }_77 }_77_77 query = applyFilter(query, validFilters);_77 const { error } = await query;_77_77 if (error) {_77 console.error(error);_77 } else if (onSuccess) {_77 onSuccess();_77 }_77 } catch (error) {_77 console.error(error);_77 }_77 }_77_77 return (_77 <form onSubmit={onSubmit} className={className}>_77 {children}_77 </form>_77 );_77}
How it is registered:
_17PLASMIC.registerComponent(SupabaseForm, {_17 name: "SupabaseForm",_17 props: {_17 children: "slot",_17 tableName: tableNameProp,_17 filters: filtersProp,_17 method: {_17 type: "choice",_17 options: ["upsert", "insert", "update", "delete"],_17 },_17 data: "exprEditor",_17 onSuccess: {_17 type: "eventHandler",_17 argTypes: [],_17 },_17 },_17});
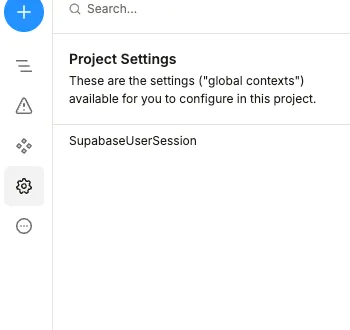
SupabaseUserSession
This component provides global user data across the application and is registered as a GlobalContext. If you’d prefer not to log in every time to see content from a specific user’s perspective, you can set a staticToken in the context settings.
You can find the authentication token from the hosted application by inspecting any network request. The token is in the Authentication header (everything after “Bearer”).
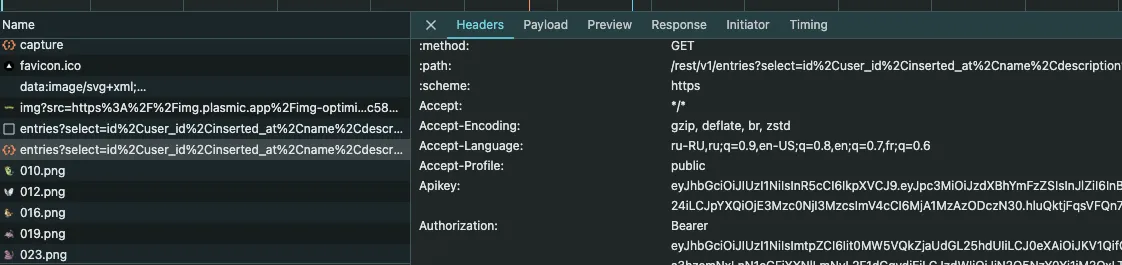
Source code:
_57import { createSupabaseClient } from "@/util/supabase/component";_57import {_57 DataProvider,_57 usePlasmicCanvasContext,_57} from "@plasmicapp/loader-nextjs";_57import { User } from "@supabase/supabase-js";_57import React from "react";_57_57export function SupabaseUserSession({_57 children,_57 staticToken,_57}: {_57 className?: string;_57 staticToken?: string;_57 children?: React.ReactNode;_57}) {_57 const supabase = createSupabaseClient();_57 const [currentUser, setCurrentUser] = React.useState<User | null>(null);_57 const [isLoaded, setIsLoaded] = React.useState(false);_57_57 const inEditor = usePlasmicCanvasContext();_57_57 React.useEffect(() => {_57 if (inEditor) {_57 if (staticToken) {_57 supabase.auth_57 .getUser(staticToken)_57 .then((res) => {_57 setCurrentUser(res.data.user);_57 })_57 .finally(() => {_57 setIsLoaded(true);_57 });_57 }_57 return;_57 }_57_57 const {_57 data: { subscription },_57 } = supabase.auth.onAuthStateChange((event, session) => {_57 if (event == "SIGNED_OUT") {_57 setCurrentUser(null);_57 } else if (["SIGNED_IN", "INITIAL_SESSION"].includes(event) && session) {_57 setCurrentUser(session.user);_57 }_57 setIsLoaded(true);_57 });_57_57 return subscription.unsubscribe;_57 }, []);_57_57 return (_57 <DataProvider name="auth" data={currentUser || {}}>_57 {isLoaded && children}_57 </DataProvider>_57 );_57}
How it is registered:
_10PLASMIC.registerGlobalContext(SupabaseUserSession, {_10 name: "SupabaseUserSession",_10 importPath: "./components/CodeComponents/GlobalContexts",_10 providesData: true,_10 props: { staticToken: "string" },_10});
RedirectIf
This component redirects the user based on a condition you specify. In our example, it redirects users from inner pages if they are not logged in.
Source code:
_33import { usePlasmicCanvasContext } from "@plasmicapp/loader-nextjs";_33import React from "react";_33_33export interface RedirectIfProps {_33 children?: any;_33 className?: string;_33 condition?: any;_33 onFalse?: () => void;_33}_33_33export function RedirectIf(props: RedirectIfProps) {_33 const { children, className, onFalse, condition } = props;_33 const inEditor = usePlasmicCanvasContext();_33_33 React.useEffect(() => {_33 if (inEditor || !onFalse || condition) {_33 return;_33 }_33 onFalse();_33 }, [condition, inEditor]);_33_33 // Validation_33 if (typeof condition === "undefined") {_33 return (_33 <p>_33 Condition needs to be a boolean prop. Try to add exclamation marks to_33 the value._33 </p>_33 );_33 }_33_33 return <div className={className}>{children}</div>;_33}
And how it is registered:
_11PLASMIC.registerComponent(RedirectIf, {_11 name: "RedirectIf",_11 props: {_11 children: "slot",_11 onFalse: {_11 type: "eventHandler",_11 argTypes: [],_11 },_11 condition: "exprEditor",_11 },_11});
Details
Third-party integrations and docs are managed by Supabase partners.